In this tutorial, we will show you how to make an envelope out of printer paper. This is a quick and easy way to make an envelope, and it only requires a few supplies that you probably already have around the house. Let’s explore with Manymoon
How To Make An Envelope Out Of Printer Paper
1. Make a Pouch Envelope
1. Make sure you get a paper at least twice the size of your envelope. If you are unsure, you can use a standard size paper of 8.5 by 11. inches. You can fold it in half before you start if you need a smaller envelope.
2. Then, fold the paper in half. The rectangle should be half the original size.

3. Tape the left and right sides together. Tape the open edges of your rectangle to seal them. Leave the top unattached. This is where your letter will be placed.

4. To make a flap, fold the top down and fold down the rectangle’s open edge to create a small flap. This will prevent the letter from falling out of the envelope. It will work with a flap measuring about 1/2 inch.

5. Insert the letter/card. Fold the flap backward and insert your letter or card. After you are done, fold the flap again.

6. To keep your message attached, glue the flap. Apply a thin line to the inner edge of your flap, and then push it down. This will seal the envelope until the recipient opens it. The flap can be secured with decorative tape or a sticker.
2. Make a Taped Envelope
1. Lay a rectangle of paper lengthwise (landscape-style). [1] While you can experiment with different paper sizes, a standard-sized piece of paper (8.5 x 11. inches) is the best.
2. Fold the paper in half along its length. To make a crease, match the edges of each piece of paper. You can then unfold the paper and create a crease in the middle.

3. Fold the top right corner in the middle crease. Fold the top right corner in a straight line until the edge of your top right corner touches the center crease. The triangle will be formed by the top right corner.
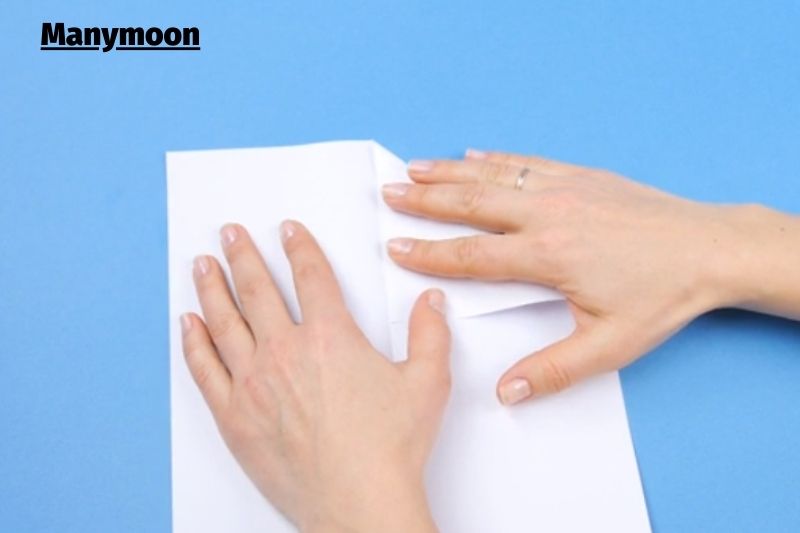
4. Fold the top corner of the left side along the middle crease. As you did with the right corner, fold the top left corner in the same way. To make a straight fold, smoothen the paper using your fingers. Now you will have two triangles on top of one rectangle.
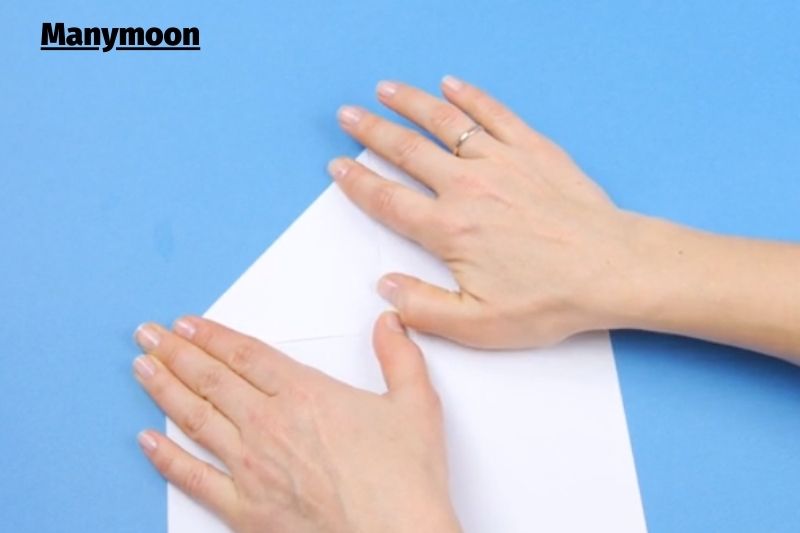
5. One inch from the top and bottom edges fold toward the center. You can use your eyes to determine the fold. Fold the top and bottom edges towards the center. This will allow for enough space to accommodate a letter or card, approximately one inch.

- The paper should be laid lengthwise at this point.
- You should still face the left with the triangular point on the paper.
6. Fold the right edge along with the bottom triangle. The left-hand edge of your folded triangle should be parallel to the right-hand edge. You will still see the triangle. You can smoothen the fold using your fingers and then unfold it.
7. Your message should be folded so that it fits in the envelope. You might not be able to use this method for large cards. However, regular letter-sized paper can still fit if folded in half and in thirds.
8. Your message should be included. You can place your note between the horizontal folds of the envelope. To keep your message inside the envelope, use the bottom flaps and the two side flaps.

9. Close the envelope. Just as you did just a moment ago, fold the right-hand edge of the paperback towards the edge of the triangle. The triangle top should be folded towards the middle of the rectangle. You will now see that the back of your envelope is similar to those purchased in stores.
10. Tape the edges. Secure the envelope’s sides with small pieces of tape. You can also tape the flap of your envelope closed.

11. Hand-deliver your letter. Postal services charge more for mail pieces that aren’t perfectly rectangular or those with irregular edges. If you don’t want to pay additional shipping fees, hand-deliver your handmade envelope.
Making a Square Origami Envelope
1. Start to Fold

You can choose if you want the printed or colored side of your paper on the inside or outside of your envelope if it has only one side. You may prefer to send it by mail. The plain side will be on the outside. If the recipient opens the envelope, the patterned side will add some color. If you prefer the outside to have the colorful side out, place the plain side first.
- Move the right corner to the left and pinch the center.
- Take the bottom corner and bring it up towards the top. Make a small pinch in the middle. You will now have an X mark.
- To meet the center of the circle, fold the right and left corners.
2. Continue to Fold
- Move the top corner towards the center, and then make a light mark in its middle. Now you have a crease.
- Fold the bottom corner towards the crease line, keeping the right and left edges straight.
- Fold your paper.
3. Fold the Flaps

- Fold the right edge from the bottom section inwards so that it aligns with the crease just made. Then, unfold.
- Fold the left side in exactly the same manner and then unfold.
- Fold the bottom corner towards the crease.
- Fold the lower right section. Pay attention to the X on the lower central flap. The top right corner of the X is aligned with the top left corner on the flap.
4. Mountain Folds:

- Open the lower section and make a new mountain fold starting at the central flap. Then, fold the right side under the central flap.
- These photos show the process and the results.
- Do the same for the left side.
5. Completion of the Folds
- Fold the lower section upwards.
- Place the right and left flaps in the middle section.
- To keep the flaps secure, you could apply glue to them.
- Fold the top down.
FAQs

1. How do you make a 5×7 envelope out of 8.5 x11?
2. What is the size of an envelope?
Regular envelopes are the most common business envelopes. This range also includes the #10 envelope, which measures 4 1/4″ by 9 1/2″. Regular envelopes have a solid front and no window. There is also a basic flap at the back.
3. What is the size of a 5×7 envelope?
What is the size of an A7 envelope? Although many people mistakenly refer to A7 envelopes as 5×7, they are actually 5 1/4×7 1/4 inches. They are envelopes for 5×7 cards. This is the most common size of invitation envelope.
Conclusion
We’ve included the guide that we mentioned earlier. In some cases, it is really beneficial. Manymoon hopes it will be easier for you to make an envelope once you have understood. If you have any further questions, please contact me directly. Please share this article with your friends if you enjoyed it. Thank you for stopping by!
